
Customizing the Back in Stock Notification Email
Each campaign has its own notification email. You can edit the subject, heading, body, button, and footer, set the sender name and button color, and add translations for every language your store sells in.
Where to edit the email
- Open the Dash app → Back in Stock → Campaigns.
- Open the campaign whose email you want to change.
-
Go to the Email tab.
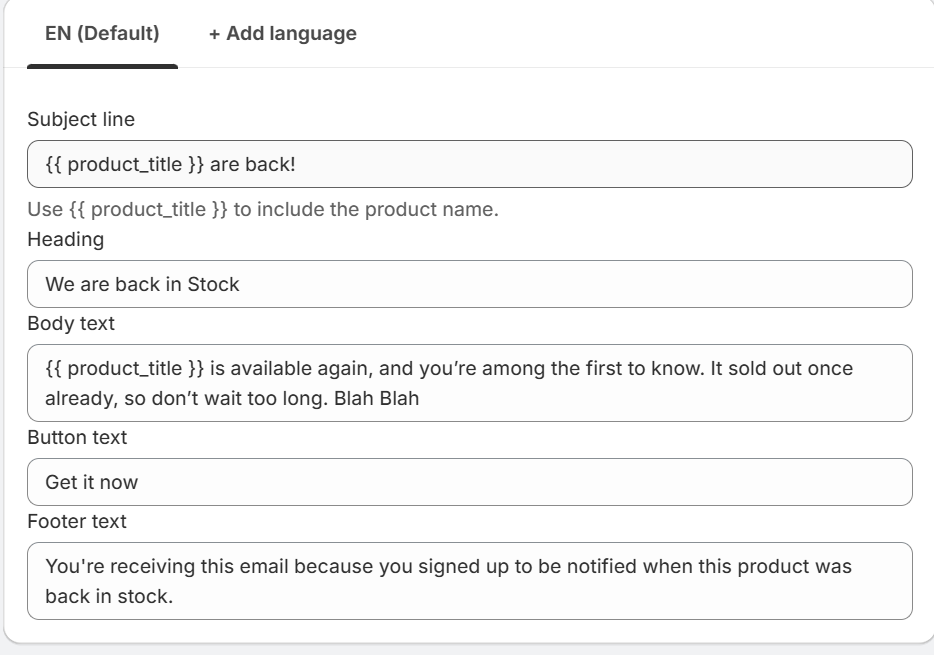
Email template editor showing subject, heading, body, button text, and footer fields
What you can edit
| Field | Where it appears |
|---|---|
| Subject | The inbox subject line |
| Heading | Large title at the top of the email |
| Body | Main message text (the first line also shows as the inbox preview) |
| Button text | The call-to-action button, for example "Shop now" |
| Footer | Small print at the bottom explaining why they got the email |
Placeholders
Type these anywhere in the fields above and Dash fills them in per subscriber:
| Placeholder | Becomes |
|---|---|
| {{ product_title }} | The product name, for example "Canvas Tote Bag" |
| {{ variant_title }} | The variant they wanted, for example "Medium / Navy". Empty for products without variants. |
| {{ shop_name }} | Your store name |
Example: Subject "
{{ product_title }} is back at {{ shop_name }}" sends as "Canvas Tote Bag is back at Northshore Goods".
Added automatically
You do not need to add these yourself. Every notification email includes:
- The product image, when one is available.
- A direct link to the product on the heading, image, and button. The link carries tracking so purchases count as conversions.
-
An unsubscribe link in the footer. One click removes the subscriber.
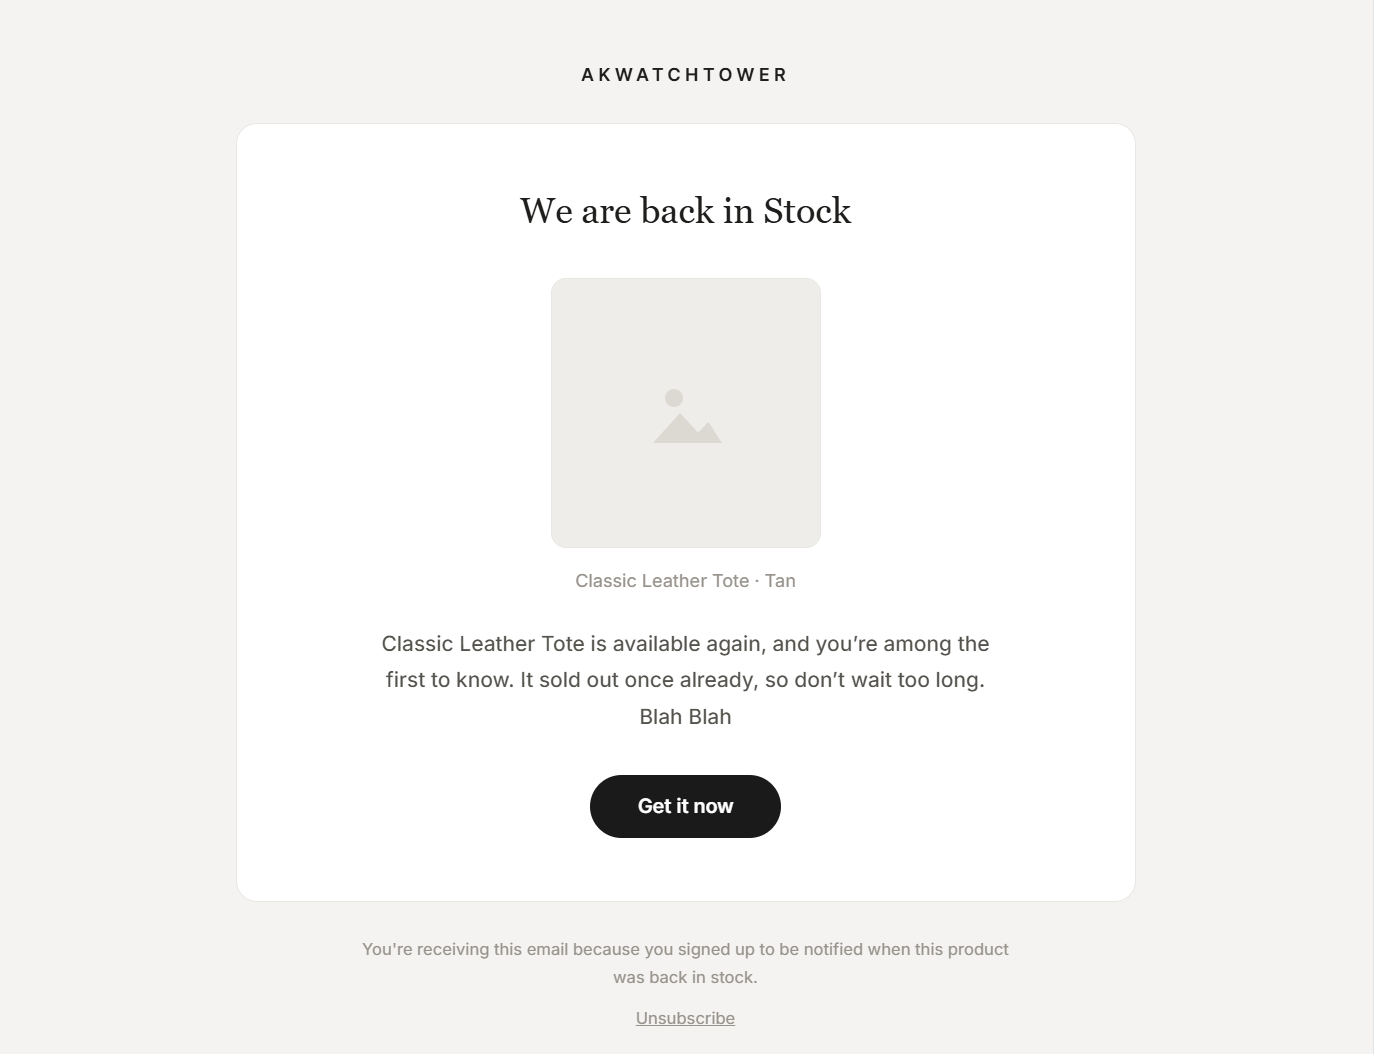
A finished notification email showing shop name, product image, heading, body, button, and unsubscribe footer
Sender settings
In the same campaign you can set:
- From name: the sender name shoppers see. Defaults to your shop name. Emails send from notifications@dashcheckout.io.
- Reply-to: where replies go. Defaults to your shop's email address.
- Accent color: the button color, as a hex code like
#1A2B3C.
Translations
Each campaign supports one email template per language.
- In the Email tab, pick a language from the language dropdown.
- Enter the translated subject, heading, body, button, and footer.
- Click Save.
How Dash picks a language for each subscriber:
- It uses the language the shopper was browsing in when they signed up.
- If you have no template in that exact language, it tries the base language (a shopper on Swiss German gets your German template).
- If there is still no match, it falls back to your store's primary language, then English.
Tip: You do not have to translate every field. Any field you leave blank uses Dash's built-in default text for that language. Defaults exist for over 170 languages.
Related Back in Stock articles
- Getting Started with Back in Stock Notifications: first-time setup.
- Building a Waitlist for Specific Products: waitlist wording examples for the email and form.
- Back in Stock Notification Channels and Plan Requirements: which plans send email.