
Getting Started with Back in Stock Notifications
Back in Stock adds a "Notify me" form to out-of-stock product pages. When you restock, Dash emails everyone who signed up, automatically. Setup takes about 10 minutes: add the theme block, review your default campaign, and run a test.
How it works
- A shopper opens a product page where the selected variant is sold out. Instead of a dead end, they see a signup form.
- They enter their email and join the list. Their signup shows in the Dash app with status "Waiting".
- Dash watches your inventory. When the variant restocks, everyone waiting gets a notification with a direct link to buy.
In beta: Back in Stock is currently in beta. If you do not see it in your Dash app, contact support and we will enable it for your store.
Step 1: Open Back in Stock in the Dash app
- Open the Dash app in your Shopify admin.
- Go to Back in Stock → Campaigns.
A Default Campaign is already there. It covers every product in your store, so you do not need to create anything to get started. Signups always have somewhere to land.

Step 2: Add the form to your theme
The signup form is a theme block. You add it once and it appears automatically on any product whose selected variant is out of stock. In-stock products never show it.
- Go to Online Store → Themes in your Shopify admin.
- Click Customize on your active theme.
- Open a product page template.
- Click Add block and choose Back in Stock Alert (under Apps).
- Drag it to where you want the form, usually below the Add to cart button.
-
Click Save.
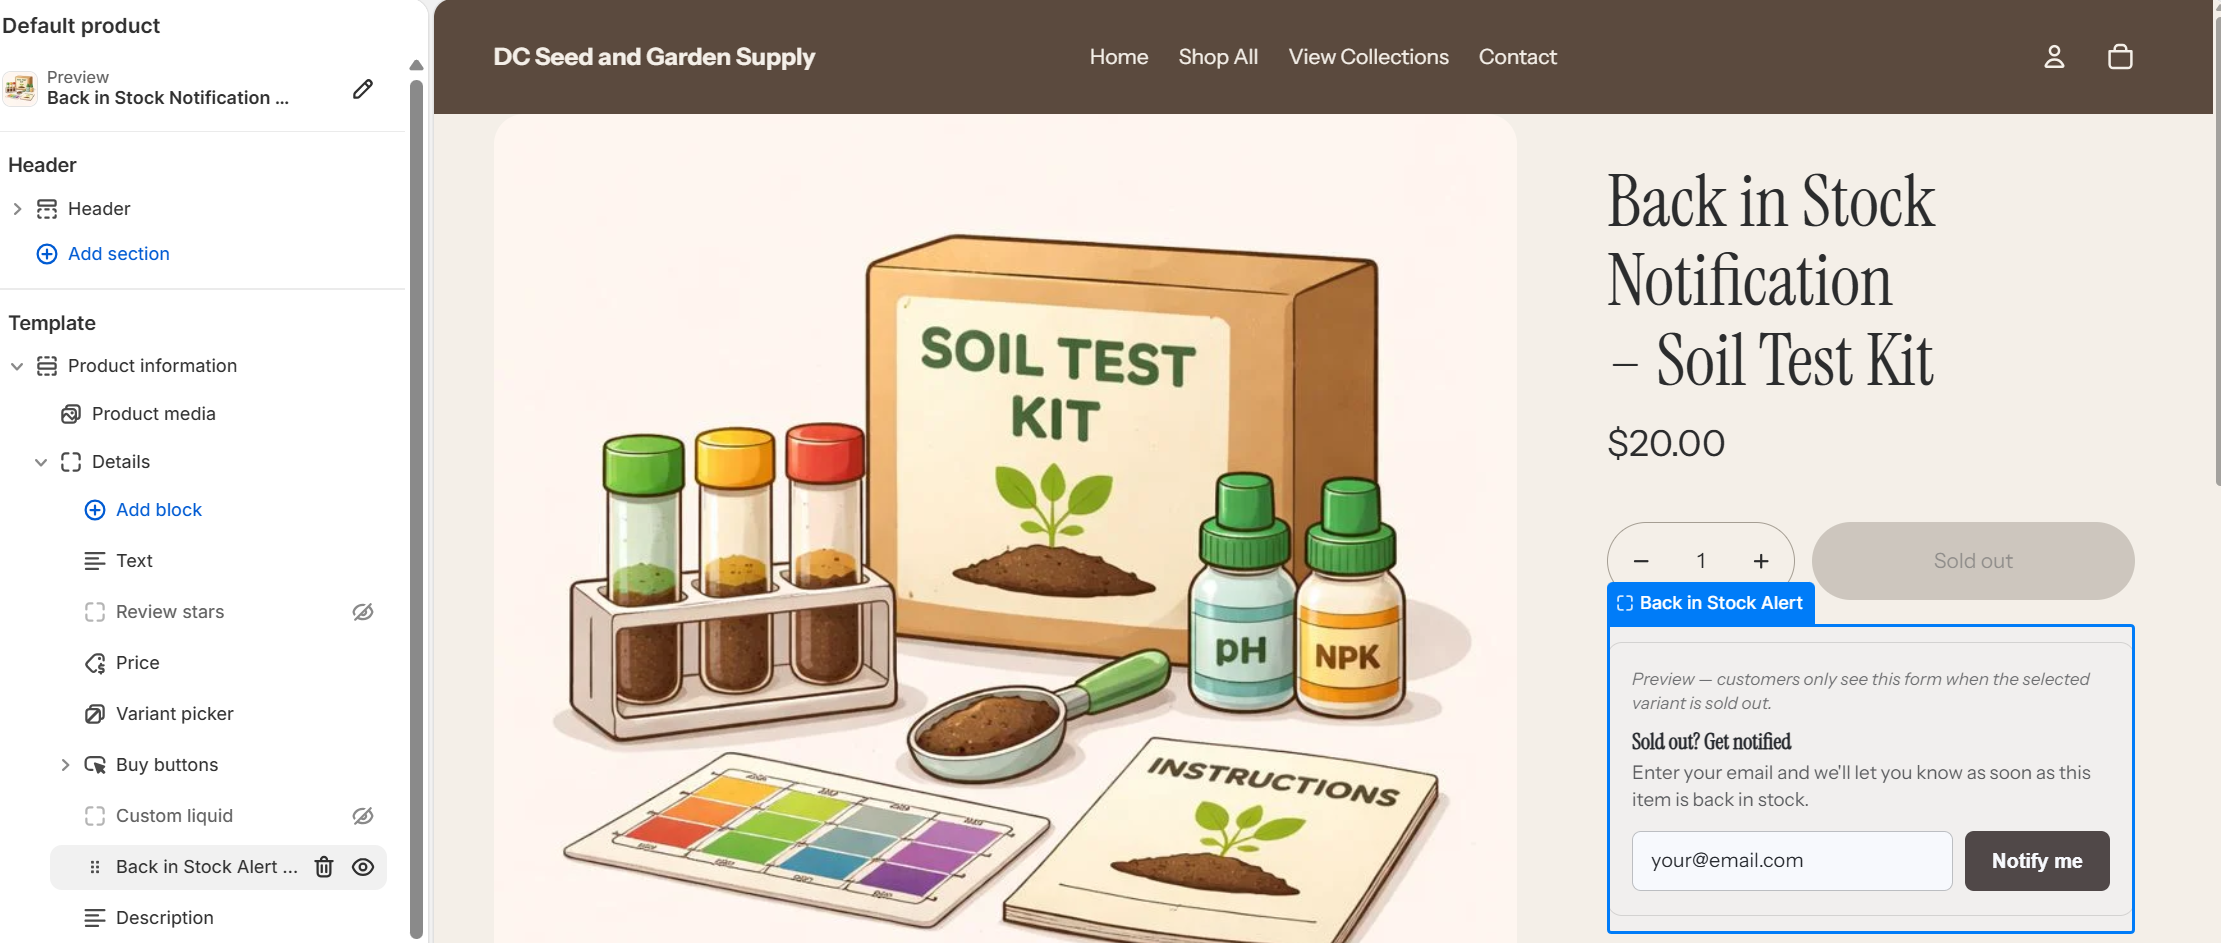
Shopify theme editor with the Back in Stock Alert block being added to a product page
While you are in the theme editor, you can change every label on the form: heading, description, button text, success message, and colors. The defaults work fine to start.

Step 3: Review your campaign settings
Open the Default Campaign and check three things:
| Setting | What it does | Default |
|---|---|---|
| Inventory threshold | Minimum units in stock before notifications send | 1 |
| Channels | How subscribers are notified: email, browser push | Email on |
| Email sender | From name, reply-to address, button color | Your shop name |
Important: Email alerts send on the Pro plan. On the Free plan, signups are still collected and saved, and browser push notifications still work. If you upgrade later, Dash automatically sends the alerts your waiting subscribers missed for products that are in stock.
Step 4: Test it
- Set a test product's inventory to 0.
- Visit its product page on your live storefront and submit the form with your own email.
- Check Back in Stock → Subscribers in the Dash app. Your email appears with status "Waiting".
- Add inventory back to the product.
-
Wait a few minutes and check your inbox.
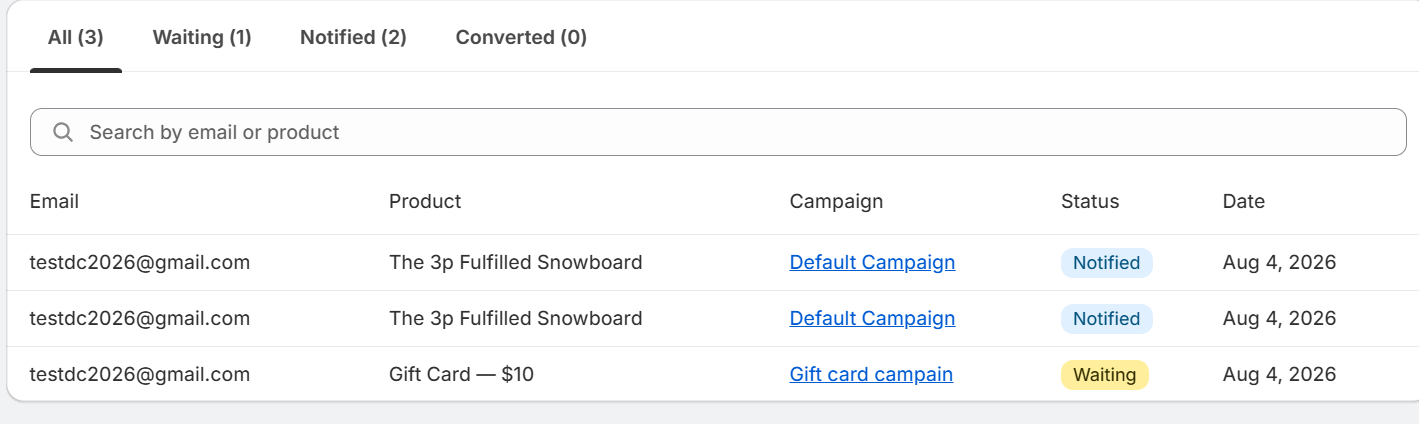
Subscribers list showing a test signup with Waiting and notified status
If the email does not arrive within 10 minutes, see Why subscribers haven't been notified yet.
Where to go next
- How campaigns choose where signups go: create extra campaigns for specific products, with priority rules.
- Customizing the notification email: change the subject, text, and languages.
- Notification channels and plans: what sends on which plan.
- Conversion tracking: see how many signups turned into sales.